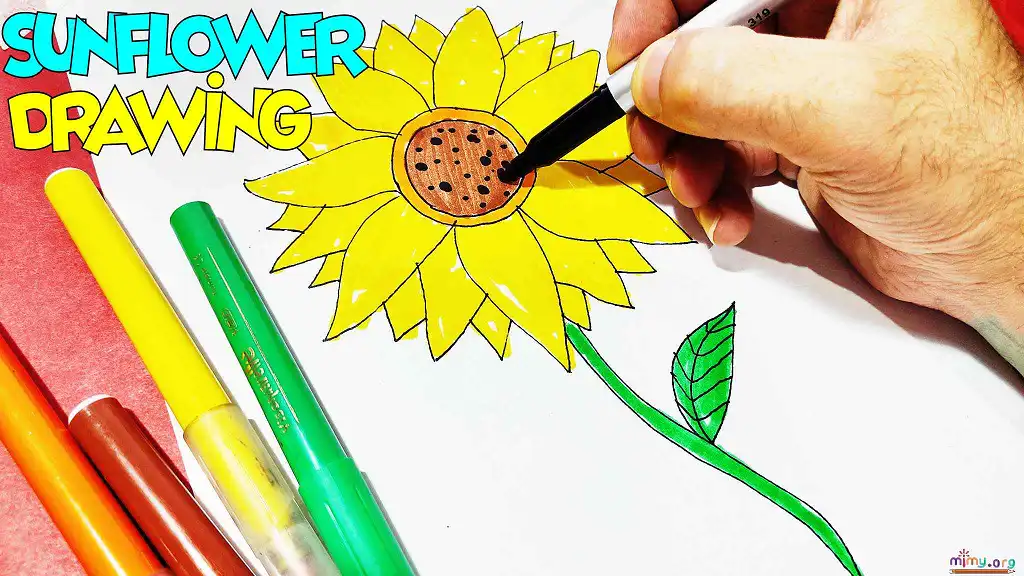
Ah, the sunflower—a golden marvel that’s basically nature’s way of showing off. With its bold petals, tall stem, and happy-go-lucky vibe, it’s no wonder artists love to capture it on paper. Whether you’re doodling in your notebook or aiming for a full-blown masterpiece, learning How to Draw Sunflower Step by Step isn’t just about lines and shapes—it’s about bringing sunshine into your art.
Sunflower Colorin Pages – PDF Download
But let’s be honest, staring at a blank page can feel like trying to grow a plant in a desert—intimidating and dry. That’s why this guide will break things down in bite-sized, petal-sized steps. By the end, you’ll not only have a stunning sunflower but also a burst of creative confidence.
So, grab your pencil, flex those fingers, and let’s turn that blank page into a blooming beauty
Step-by-Step Drawing Tutorial (Video)
# Step 1: Get Your Tools Together
Before diving into the artistic trenches, make sure you’ve got the right gear. You don’t need a fancy art studio—just the basics:
Pencils (HB for sketching, 2B–4B for shading)
Eraser (the clean-up crew)
Sharpener (because dull pencils are dream killers)
Drawing paper (smooth or textured—your call)
Optional: Colored pencils, markers, or watercolors for that golden glow
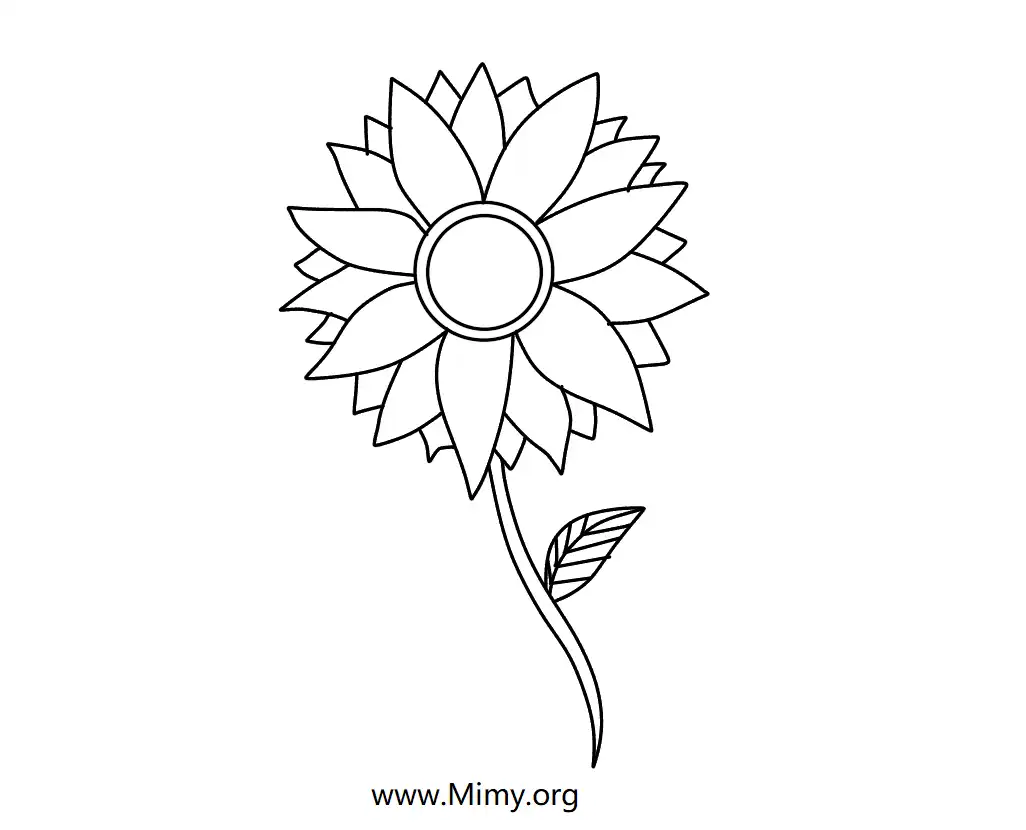
# Step 2: Start with a Simple Circle
Every masterpiece starts simple. For your sunflower, draw a neat circle—this will be the center, or the “face” of your flower. Don’t stress over perfection; nature isn’t about perfect geometry anyway.
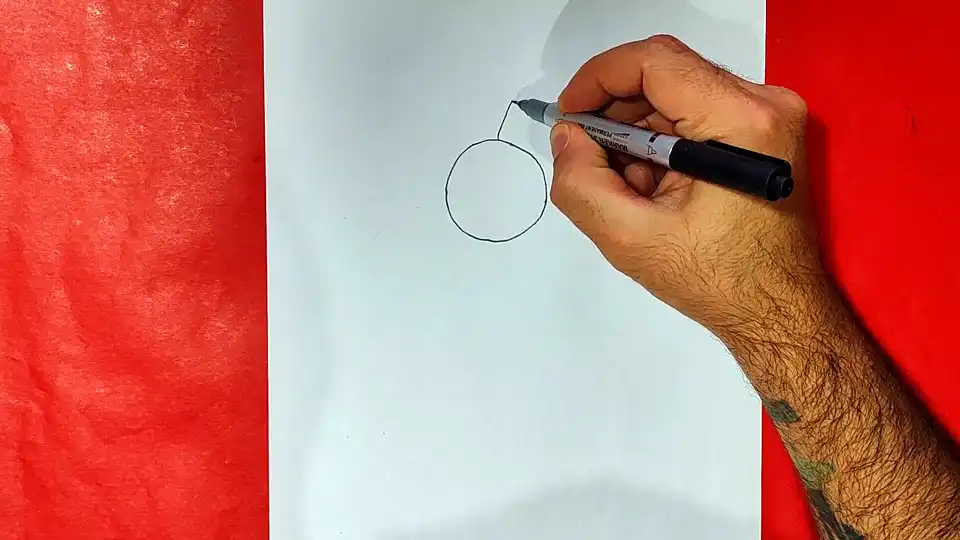
Pro tip: Light, gentle strokes are key here. Think of it as whispering to the paper, not shouting.
# Step 3: Add the Petal Guidelines
From the circle’s edge, lightly sketch lines radiating out like the hands of a clock.
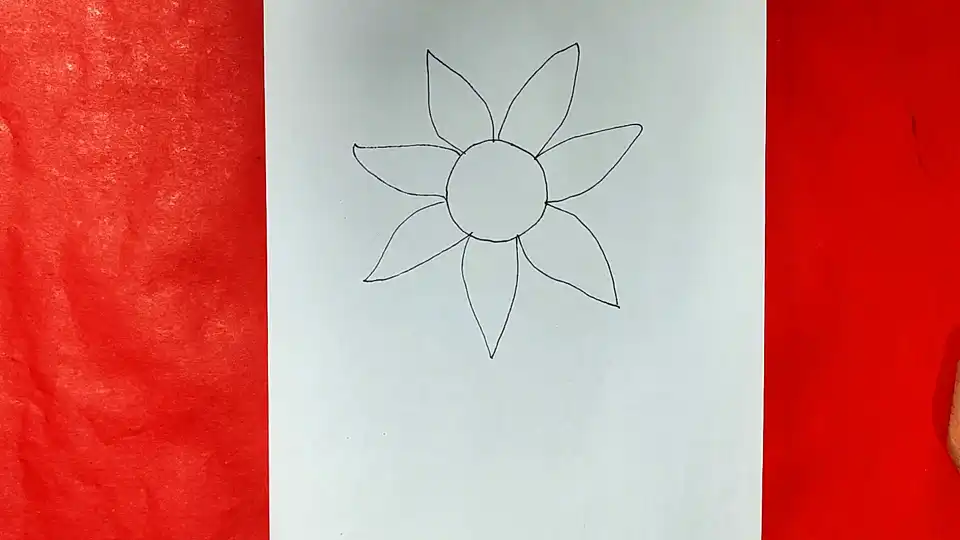
These will guide the placement of your petals so they don’t end up looking like they’re in a sunflower traffic jam.
# Step 4: Shape the Petals
Here’s where it gets fun. Draw long, oval-shaped petals along your guideline spokes.
Sunflower petals tend to have a slightly pointed tip, so give them a subtle taper. Overlap a few petals for a more natural look.
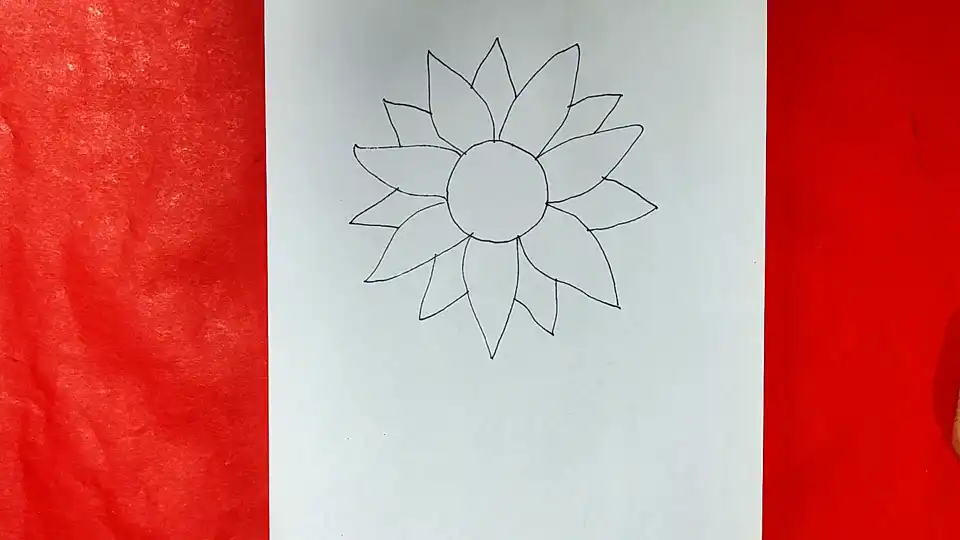
# Step 5: Fill in More Petals
Nature’s generous—so your sunflower should be too. Add a second layer of petals peeking out from behind the first. This adds depth and makes your flower look full and lush.

# Step 6: Detail the Center
Sunflower centers are textured, like nature’s own pixel art. Inside the circle, draw tiny overlapping dots or short curved lines to give it that seed-filled look. If you’re feeling extra, you can even shade from the outside in for a realistic touch.
# Step 7: Draw the Stem and Leaves
A sunflower without a stem is like a cake without frosting unfinished.
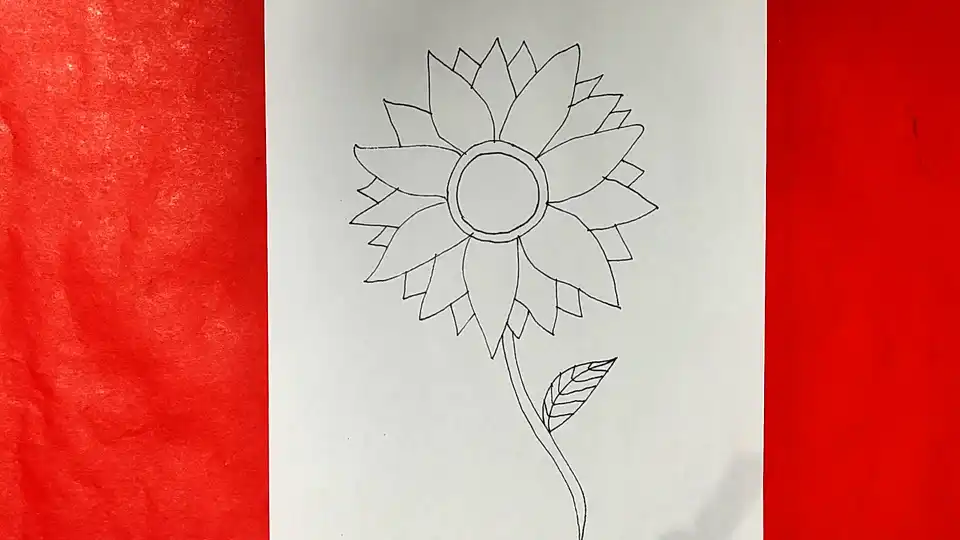
Draw a tall, slightly curved stem to give it character. Add large, heart-shaped leaves with visible veins for authenticity.
# Step 8: Bring It to Life with Shading
Now comes the magic. Use a softer pencil to shade the darker areas:
Under the petals
Around the edges of the seed center
Along the stem’s side opposite the “light source”
This step transforms your flat sketch into something that almost feels alive.
# Step 9: Add Color (Optional but Fun)
If you’re going for the full golden glory, whip out your colored pencils or paints:
Petals: Bright yellow with hints of orange near the base
Center: Deep brown or black with lighter highlights
Leaves & Stem: Rich green with a touch of yellow-green
# Step 10: The Final Touches
Erase any unnecessary guidelines. Go over your main lines with a slightly darker pencil for definition. Step back, squint, and admire your sunflower—because yes, you made that.
Tips for Nailing the How to Draw Sunflower Step by Step Process
Observe real sunflowers: Nature’s the best teacher.
Don’t overthink symmetry: Slight differences make it more lifelike.
Use layers of shading: It adds realism without overcomplicating.
Practice patience: Art’s a marathon, not a sprint.
Common Mistakes to Avoid
Flat petals – Remember to curve them slightly for depth.
Skipping guidelines – They’re your secret weapon against a lopsided flower.
Over-erasing – It can smudge your paper and weaken your lines.
One-shade coloring – Blend yellows and oranges for a richer look.
Why Drawing Sunflowers is So Relaxing
Drawing a sunflower isn’t just an art exercise—it’s a stress-busting, mood-lifting experience. There’s something deeply satisfying about watching those petals unfold on the page. Plus, sunflowers are naturally joyful; you can’t help but feel a bit brighter yourself.
FAQs about How to Draw Sunflower Step by Step
Q: I can’t draw straight lines—can I still draw a sunflower?
A: Absolutely! Nature’s lines aren’t perfectly straight either. Wobbles add charm.
Q: How long will it take me to draw one?
A: For beginners, maybe 20–30 minutes. For detail lovers, up to an hour.
Q: Should I start with pen or pencil?
A: Always pencil first—you can ink later if you like.
Q: Can I make a cartoon-style sunflower?
A: Go for it! The same steps apply; just exaggerate features for a playful look.
Conclusion
And there you have it—a blooming masterpiece, petal by petal. Learning How to Draw Sunflower Step by Step isn’t just about following instructions; it’s about connecting with your creative side and letting it shine. Whether you keep your sunflower monochrome or splash it with bold colors, the real beauty lies in the process.
So, the next time you see a sunflower swaying in the breeze, grab your sketchbook. You’ll know exactly how to capture that sunshine on paper—and you might just find yourself smiling while you do it.